Initially we were going to go with mostly hardwood but what we really liked was also really expensive. “Why don’t we just tile everything?” Downstairs anyhow. I grew up in Florida and this seemed like a perfectly reasonable solution. I like tile. And this simplified things immensely. Finding the right tile, OTOH . . . Again, quite a lot of what we liked was pretty expensive. Aside from the regular outlets we were also checking liquidation centers. The trick here is you have to hit them regularly until you find something you like. I was starting to worry, amidst pallets stacked high with the blandest ceramic I'd ever seen, until I rounded that corner and John says "my eyes lit up" and he knew that was the one. Or something like that.
It looked like storm clouds rolling in over the ocean. Being porcelain it would be durable, which was also something that was important to us. And having the same tiles throughout the first floor would help in creating the fluid feel we were looking for.
The tile for the master bath/closet and laundry became much easier once I overcame my aversion to brown/beige. It's not so much that I dislike brown, it's just I'd seen too much suburban tract design (Hello Florida!) and I get twitchy. Fortunately I was able to find some modern use of browns, although I still get a bit nervous on occasion. But this tile was good. 12x24, so we could do a brick pattern, and enough variation in the color that it gave us more decorating freedom.
As the master closet, bathroom and laundry room will all be one suite we used the same tile throughout.
The rest of the upstairs was a lot of puzzling as well. We definitely wanted solid hardwood. We considered bamboo for a while, as there are some really pretty ones, and some of the newer strand woven types have an incredibly high Janka rating, but in the end still had some doubts. Too new, not enough really good information out there. So we decided to stick to traditional hardwood. We still wanted something fairly tough but also interesting. I love tigerwood (not Tiger Woods) but that starts getting really pricey. All the oak we saw was "meh", and a bit soft. Just when we thought we were going to pull our hair out we found HICKORY! It was a happy moment. Hard enough, but not too hard, pretty and affordable.
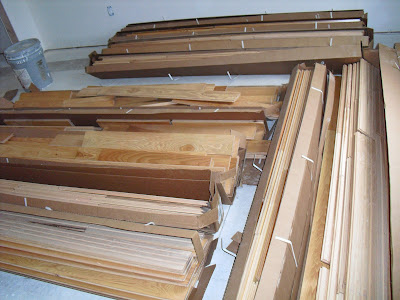
Wood floors have to acclimate before installing, allowing the moisture content to adjust to normal living conditions. If you don't you can end up with separating and gapping or swelling and buckling. The wood was brought in, boxes opened and allowed to breathe for two weeks before it was installed. Fortunately we had heat by this point so "normal living conditions" were no problem.

The planks were first laid out to be sure that none of the joints lined up next to one another so the end result would be random and more natural looking. Once in place they were nailed down with a pneumatic gun which you hit with a rubber mallet on the tung side of the plank.
Mostly this went well, until getting to the last rows, we ended up a bit too close a few times and ended up with dents in the drywall. Oops. Switched over to a standard nail gun then finally hammer and nails. The hall was the worst of it, once done the rooms went considerably faster.
Done! Standing back to admire our work we could see the beauty and natural variation of the wood.
The stairs were the last to go in. We'd been working with temporary treads throughout most of the construction as you don't want your permanent stairs in while people are tracking mud, sawdust, grout, mortar and all manner of substances in and out of the house.
We had initially planned on trying to match the hickory by staining white oak, then realized it would be just about impossible. So we went with red oak instead and figured we'd do something completely different. We'd been researching and reading about various alternative stains (mostly vinegar and steel wool) or possibly liming, but that would have required a lot of experimentation and the potential to mess them up was pretty high. John had done some pickling so we felt a bit more confident with that method, although we were going dark rather than light.
Most pickling is done with light colors or white, meant to give an aged or antique look to wood, usually furniture, but you're basically staining. We tried some light paint but it looked a wee shabby chic (ACK!) so went dark instead. Initial results are good, but we still aren't sure.
Stay tuned for developments.


Thanks for sharing! Can't wait to see more!
ReplyDeleteThank you! Should hopefully have more up soon. Blogger going down ate some content and real life gets in the way.
ReplyDelete